Tours.904 Tutorial
Step 1: Create a folder in your email provider
Exciting news! You’ve just received an email notifying you that your project is ready to access. What’s the next step?
This tutorial will guide you through the process of downloading your photographs and utilizing the property website links.
For the best experience, 904.Tours suggests using the Google web browser. In case you encounter any problems, we recommend switching to the Google browser for smoother navigation.
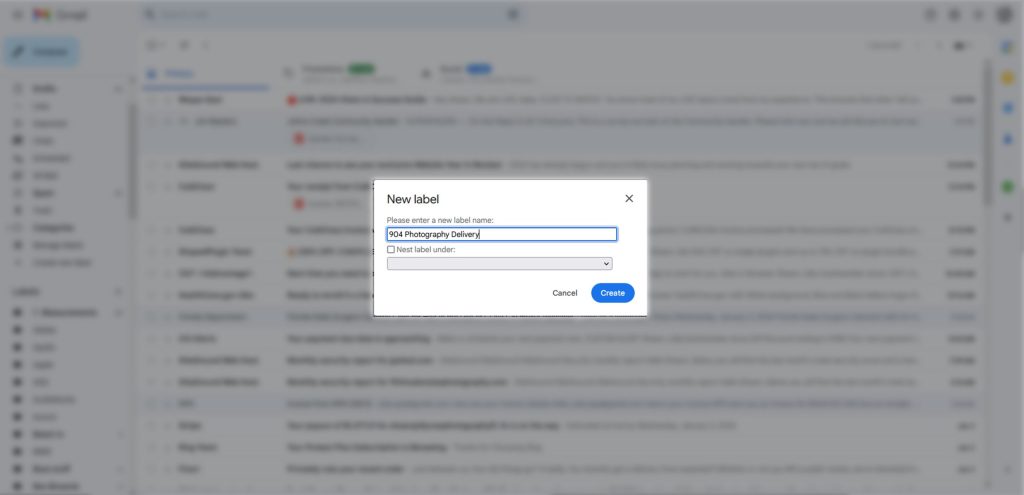
To begin, create a new folder within your email provider and name it “Photos” or “904 Photography delivery”. Next, move the received project email into this newly created folder. Keep in mind that the project link remains active for one year.
Step 2: How To Access & View The Project
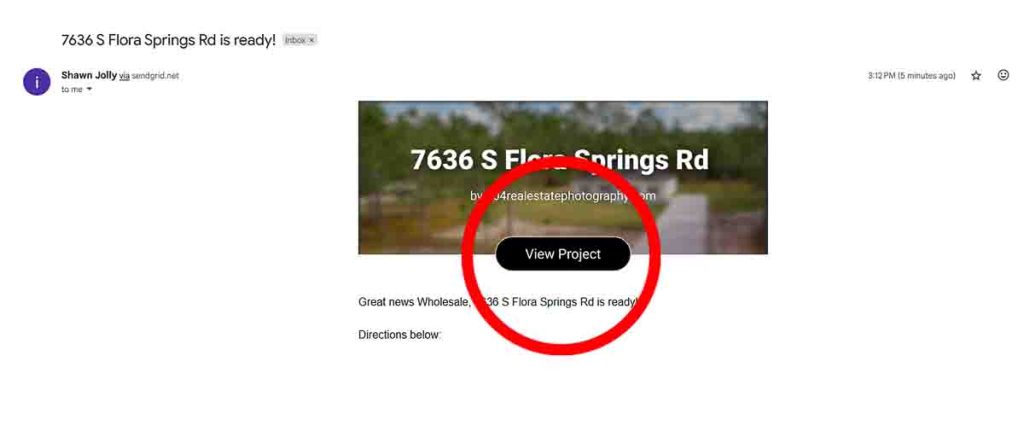
Within the email, there will be an image representing the project. Click on “View Project” to access it. If the image isn’t visible, please ensure that images are enabled in your email settings.
Step 3: Navigating The Project Page
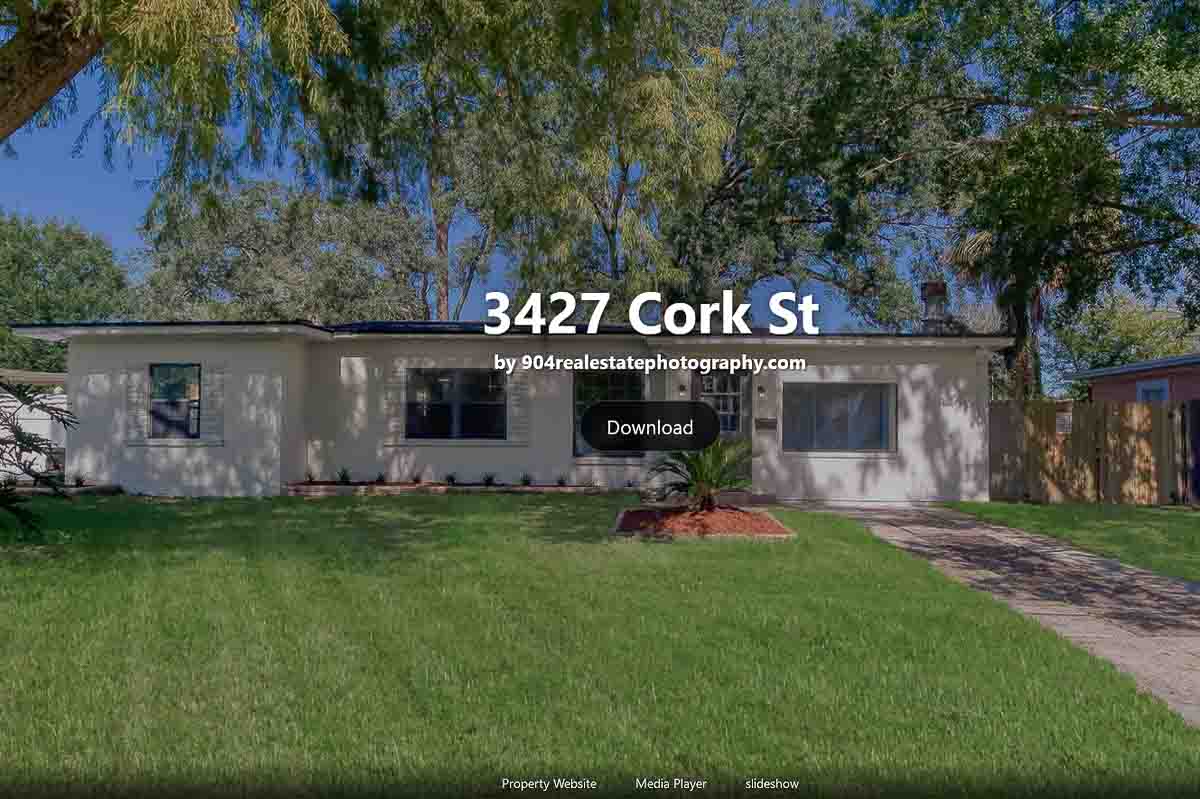
Upon clicking “View Project,” you’ll reach the project deliverables screen. Here, you have the option to download MLS-sized photographs by clicking the download button. Alternatively, scroll down to explore the property website, media player, and various photo download options in different sizes.
I provide images in full size, web, MLS, and Airbnb media sizes. As you scroll further, you’ll find the property website link visibly displayed.

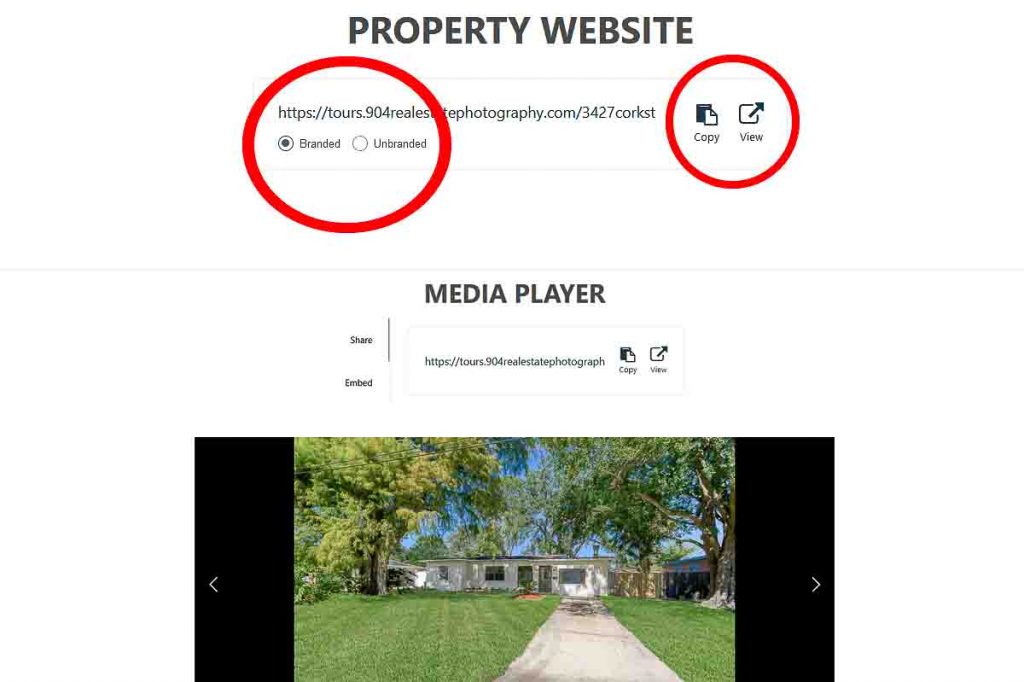
Step 4: How To View & Share The Property Website
At this point, you have the option to select either branded or unbranded versions. Once chosen, you can proceed to either copy the link or click “View” to access the property website.
When sharing the property website, choose “Copy” and easily share it via Facebook, text, email, or even insert it into the virtual tour section on the MLS.
Now, let’s scroll down to explore the media player and discover what it offers.
Step 5: How To View & Share The Media Player
The media player showcases a slideshow of carefully chosen photographs, highlighting the best selections.
Ensure that the share button is already selected, which is usually the default setting. Click on “Copy” to share these images on platforms like Facebook, through text, email, and even for insertion into the virtual tour section on the MLS.
Now, let’s move further down to explore the photo section.


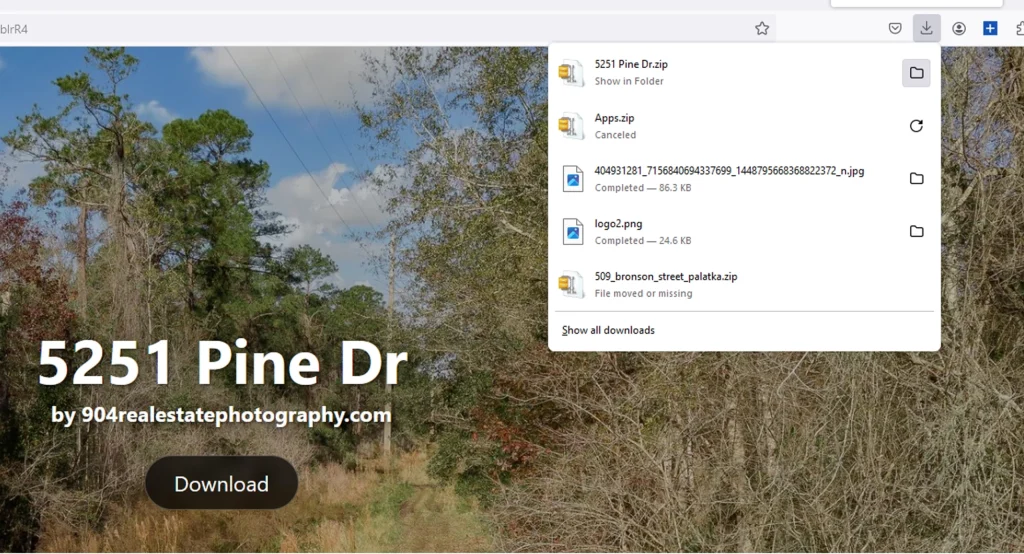
Step 6: How To Download Photos With Different Resolutions.
Within the “Photos” tab, clicking on “Download” will automatically start downloading the MLS-sized photographs. Alternatively, clicking on the arrow tab situated to the right of the download option will display a dropdown menu with various available media formats for download.
That’s all! Your photos are currently downloading, and you’re nearly prepared to insert them on the MLS.
Keep scrolling down for the following step in the process.
Step 7: Locate The Folder Where Your Project Was Saved On Your Computer
Click on your downloads tab, then select the projects folder. The file manager will appear containing all your downloads. Windows users will need to unzip the folder, whereas Mac users will find the folder already unzipped.
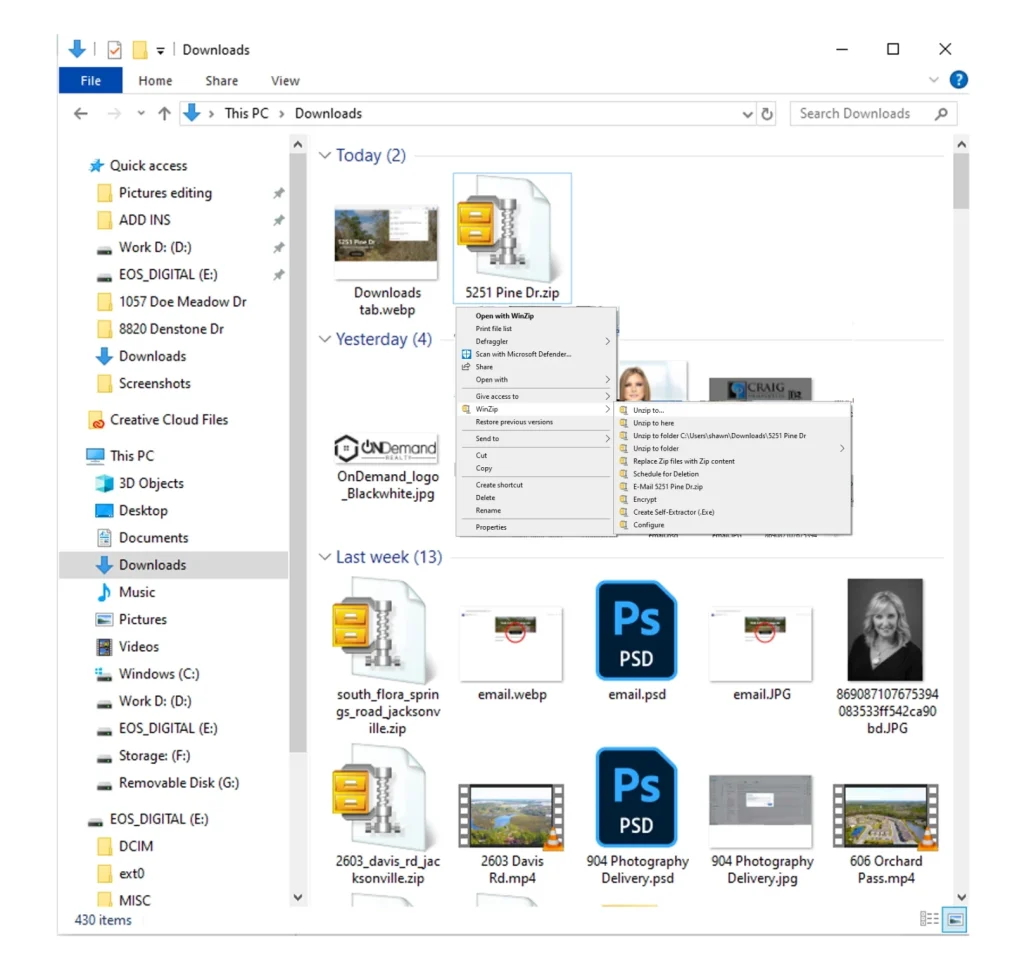
Step 8: How To Unzip/Extract Project Files
After finding your project folder, right-click on it. Choose “Unzip to” or “Extract” from the menu options. Select the location where you want the folder unzipped/extracted files to be saved and then proceed to use them.